Table of Contents (Start)
- Topics
- Introducing SevOne
- Login
- Startup Wizard
- Dashboard
- Global Search - Advanced Search
- Report Manager
- Report Attachment Wizard
- Report Properties
- Report Interactions
- Instant Graphs
- TopN Reports
- Alerts
- Alert Archives
- Alert Summary
- Instant Status
- Status Map Manager
- Edit Maps
- View Maps
- FlowFalcon Reports
- NBAR Reports
- Logged Traps
- Unknown Traps
- Trap Event Editor
- Trap Destinations
- Trap Destination Associations
- Policy Browser
- Create and Edit Policies
- Webhook Definition Manager
- Threshold Browser
- Create and Edit Thresholds
- Probe Manager
- Discovery Manager
- Device Manager
- New Device
- Edit Device
- Object Manager
- High Frequency Poller
- Device Summary
- Device Mover
- Device Groups
- Object Groups
- Object Summary
- Object Rules
- VMware Browser
- AWS Plugin
- Azure Plugin (Public Preview)
- Calculation Plugin
- Database Manager
- Deferred Data Plugin
- DNS Plugin
- HTTP Plugin
- ICMP Plugin
- IP SLA Plugin
- JMX Plugin
- NAM
- NBAR Plugin
- Portshaker Plugin
- Process Plugin
- Proxy Ping Plugin
- SDWAN Plugin
- SNMP Plugin
- VMware Plugin
- Web Status Plugin
- WMI Plugin
- xStats Plugin
- Indicator Type Maps
- Device Types
- Object Types
- Object Subtype Manager
- Calculation Editor
- xStats Source Manager
- User Role Manager
- User Manager
- Session Manager
- Authentication Settings
- Preferences
- Cluster Manager
- Maintenance Windows
- Processes and Logs
- Metadata Schema
- Baseline Manager
- FlowFalcon View Editor
- Map Flow Objects
- FlowFalcon Views
- Flow Rules
- Flow Interface Manager
- MPLS Flow Mapping
- Network Segment Manager
- Flow Protocols and Services
- xStats Log Viewer
- SNMP Walk
- SNMP OID Browser
- MIB Manager
- Work Hours
- Administrative Messages
- Enable Flow Technologies
- Enable JMX
- Enable NBAR
- Enable SNMP
- Enable Web Status
- Enable WMI
- IP SLA
- SNMP
- SevOne Data Publisher
- Quality of Service
- Perl Regular Expressions
- Trap Revisions
- Integrate SevOne NMS With Other Applications
- Email Tips and Tricks
- SevOne NMS PHP Statistics
- SevOne NMS Usage Statistics
- Glossary and Concepts
- Map Flow Devices
- Trap v3 Receiver
- Guides
- Quick Start Guides
- AWS Quick Start Guide
- Azure Quick Start Guide (Public Preview)
- Data Miner Quick Start Guide
- Flow Quick Start Guide
- Group Aggregated Indicators Quick Start Guide
- IP SLA Quick Start Guide
- JMX Quick Start Guide
- Metadata Quick Start Guide
- RESTful API Quick Start Guide
- Self-monitoring Quick Start Guide
- SevOne NMS Admin Notifications Quick Start Guide
- SNMP Quick Start Guide
- Synthetic Indicator Types Quick Start Guide
- Topology Quick Start Guide
- VMware Quick Start Guide
- Web Status Quick Start Guide
- WMI Quick Start Guide
- xStats Quick Start Guide
- xStats Adapter - Accedian Vision EMS (TM) Quick Start Guide
- Deployment Guides
- Automated Build / Rebuild (Customer) Instructions
- Generate a Self-Signed Certificate or a Certificate Signing Request
- SevOne Best Practices Guide - Cluster, Peer, and HSA
- SevOne Data Platform Security Guide
- SevOne NMS Implementation Guide
- SevOne NMS Installation Guide - Virtual Appliance
- SevOne NMS Advanced Network Configuration Guide
- SevOne NMS Installation Guide
- SevOne NMS Port Number Requirements Guide
- SevOne NMS Upgrade Process Guide
- SevOne Physical Appliance Pre-Build BIOS and RAID Configuration Guide
- SevOne SAML Single Sign-On Setup Guide
- Cloud Platforms
- Other Guides
- Quick Start Guides
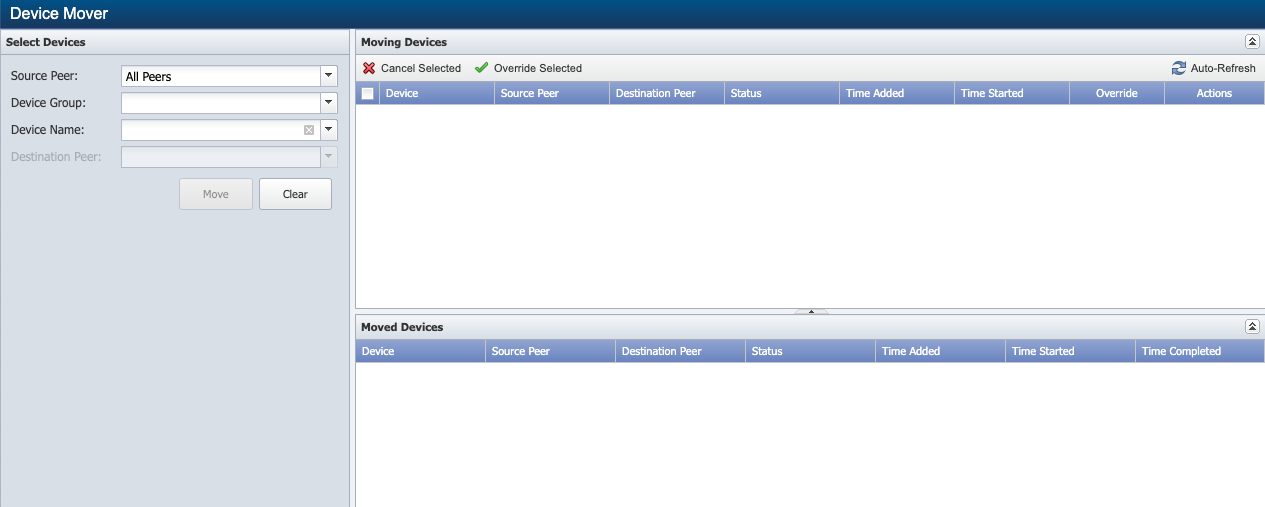
Device Mover
The Device Mover enables you to move a device from one peer to another peer when you have a multi-peer cluster.
To access the Device Mover from the navigation bar, click the Devices menu and select Device Mover. You can also access the Device Mover from the Edit Device page.
If you have a single peer cluster, the fields on the Device Mover are disabled.
There are several reasons to move devices from one peer to another.
-
When a peer exceeds the license capacity, that peer does not discover any objects that go beyond the peer capacity. This prevents a peer from being overloaded which impacts the integrity of the peer. No metrics are collected from objects that are not discovered.
-
When a peer discovers a device and the device is physically closer to a different peer, you may want to move the device to the peer that is physically closer to prevent latency issues.
Move Devices
The left side enables you to select the source peer from which to move devices, the devices to move, and the destination peer to which to move the devices. Devices that have a large number of polled objects can take a relatively long time period to move because of the amount of data collected for the device.
-
Click the Source Peer drop-down and select the peer from which you want to move devices.
-
Select All Peers to display all devices in the Device Name drop-down list. This enables you to move any device from any peer.
-
Select a specific peer to display the devices the peer polls in the Device Name drop-down list. When you select a peer, you see the following details under the Source Peer field.
-
Object Count - displays the number of objects the peer uses, the number of objects the peer is licensed to use, and the percentage of the license capacity the peer uses. The value in this field is derived from Administration > Cluster Manager/Peers display.
-
Indicators/sec - displays the total number of indicators the peer receives per second from all interfaces. The value in this field is derived from Administration > Cluster Manager/Peers display.
-
Peer Retention (days) - data retention in days from the source peer. The value in this field is derived from Administration > Cluster Manager/Peers display.
-
-
-
Click the Device Group drop-down and select a device group/device type to display devices that are members of the device group/device type in the Device Name drop-down list.
-
Click the Device Name drop-down and select the devices to move. The number of objects polled on the selected devices displays below the Device Name field.
-
Click the Destination Peer drop-down and select the peer to which to move the devices you select. The capacity of the peer you select appears below the Destination Peer field.
-
Object Count - displays the number of objects the peer uses, the number of objects the peer is licensed to use, and the percentage of the license capacity the peer uses. The value in this field is derived from Administration > Cluster Manager/Peers display.
-
Indicators/sec - d isplays the total number of indicators the peer receives per second from all interfaces. The value in this field is derived from Administration > Cluster Manager/Peers display.
-
Peer Retention (days) - data retention in days from the destination peer. The value in this field is derived from Administration > Cluster Manager/Peers display.
-
-
Click Move to add the devices to the Moving Devices section on the right. Devices in the Moving Devices section are queued to move the next time the move engine runs.
Move a device from a peer with a higher retention value to a peer with lower retention valueIf a device is moved from a peer with a higher retention value to a peer with a lower retention value, you will get a warning message to confirm the device move. In the example below, Peer Retention for Source Peer is 365 days which is higher than the Peer Retention for Destination Peer of 10 days.
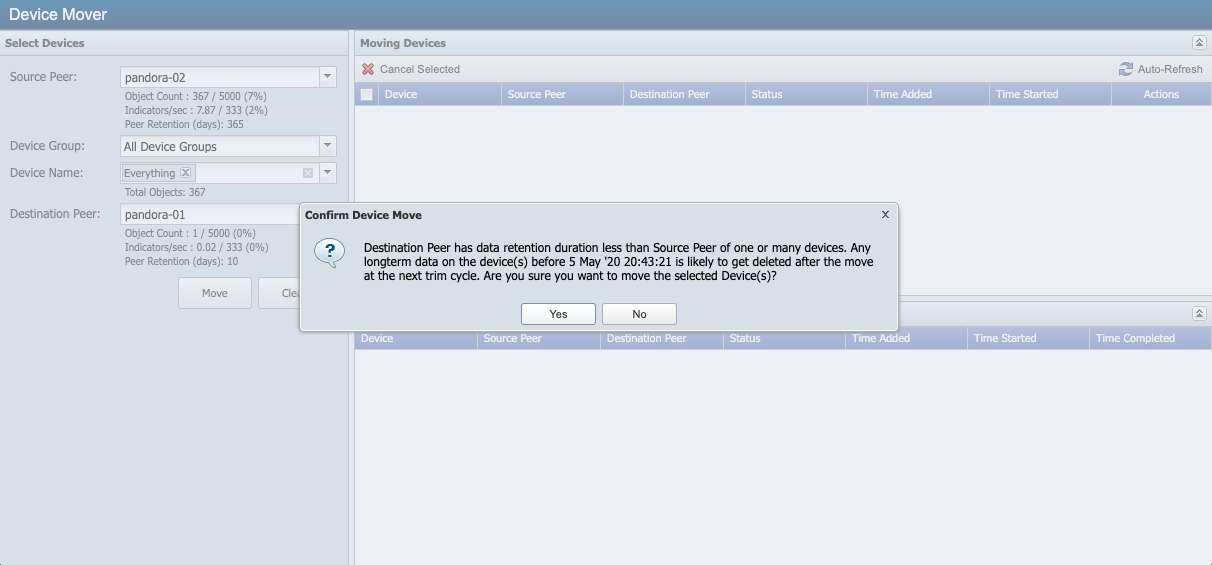
When you click on Yes, the device is queued for the move. If you click on No, you have the option to Clear or make any updates to the values in the fields.
When the data retention duration of the Destination Peer is less than the duration of the Source Peer, you will lose data on the destination.
Move a device from a peer with a lower retention value to a peer with higher retention valueIf a device is moved from a peer with a lower retention value to a peer with a higher retention value, you will get a warning message to confirm the device move.
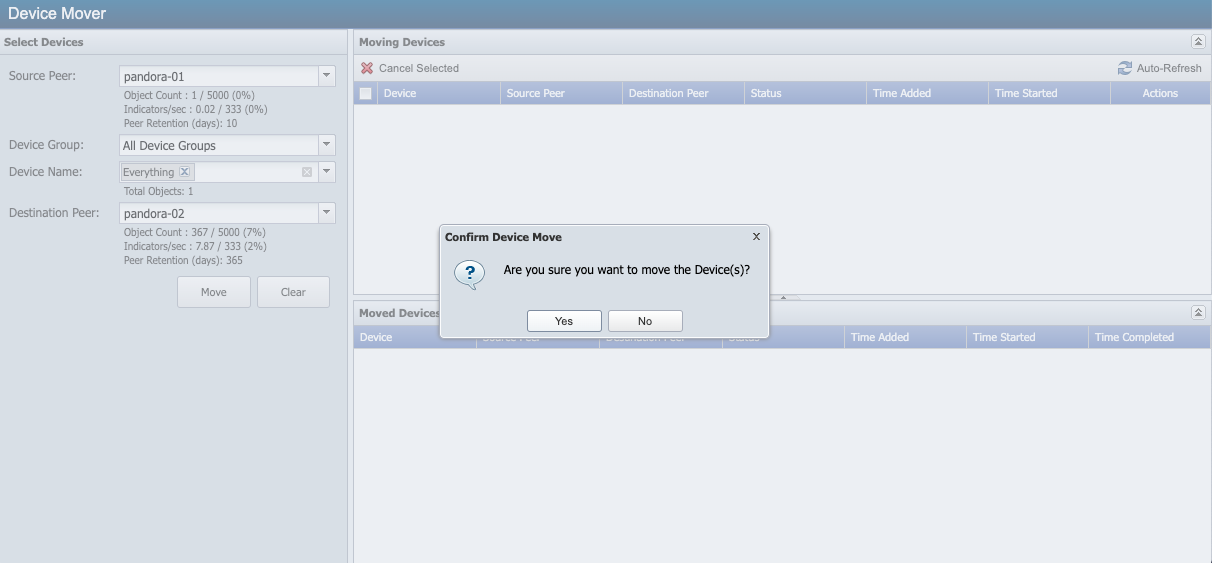
When you click on Yes, the device is queued for the move. If you click on No, you have the option to Clear or make any updates to the values in the fields.
Moving Devices
The Moving Devices section displays the list of devices you schedule to move and enables you to monitor the progress of the move.
-
Select the check box for each device you want to cancel the move and click Cancel Selected or click X in the Actions column. After a move starts you cannot cancel the move. Successful moves are removed from the list.
-
Device - Displays the name of the device to move. Click the device name to display the Edit Device page for the device.
-
Source Peer - Displays the name of the peer from which the device is to move. Click the peer name to display the Cluster Manager appliance level statistics for the source peer.
-
Destination Peer - Displays the name of the peer to which the device is to move. Click the peer name to display the Cluster Manager appliance level statistics for the destination peer.
-
Status - Displays the status of the move. Displays n/a when the move has yet to occur.
-
Time Added - Displays the time the move was added to the list.
-
Time Started - Displays the time the move started.
-
Time Completed - Displays the time the move was completed.
-
Override - Select the check box(es) for the device(s) that have failed to move due to connectivity issues. By doing this, the check boxes for the devices selected will override the connectivity check.
Moved Devices
The Moved Devices section displays the list of devices that have been moved.
-
Device - Displays the name of the device that was moved. Click the device name to display the Edit Device page for the device.
-
Source Peer - Displays the name of the peer from which the device was moved. Click the peer name to display the Cluster Manager appliance level statistics for the source peer.
-
Destination Peer - Displays the name of the peer to which the device was moved. Click the peer name to display the Cluster Manager appliance level statistics for the destination peer.
-
Status - Displays the status of the move.
-
Time Added - Displays the time the move was added to the list.
-
Time Started - Displays the time the move started.
-
Time Completed - Displays the time the move was completed.
Flow Falcon Device Mover
Pre-Checks
Prior to Move NetFlow Devices, execute the pre-checks to ensure that the destination peer has the resources to handle the devices moved from the source peer to the destination peer. Option, -p, --do-pre-checks, performs all pre-checks. There are other options such as -c, --only-check-capacity (existing option) or -d, --only-check-disk-space (new option), which allow you to perform the checks one by one.
The checks must be run on the source peer.
$ SevOne-act flowdb move -p --label devMove1 --device 10.2.12.199 --remote-peer-ip 10.129.13.66 --verboseThe checks stop on the first error. If you move more than one device, the listed error will not represent all the resources required for them, unless the error is on the last device in the list.
To check disk space, use option -d.
To check the capacity (number of Flow interfaces), use option -c.
After executing the SevOne-act flowdb move command above, logs can be found in /var/SevOne/flowdb-move.log.
2019-06-24T14:15:48+00:00 Checking device: 172.24.0.195
2019-06-24T14:15:48+00:00 Interface Limit on remote machine is 300. It already has 155 and you are trying to add (at least) 150 new interfaces.
2019-06-24T14:15:48+00:00 01. Check remote peer capacity.
2019-06-24T14:15:48+00:00 [FAIL]
2019-06-24T14:15:48+00:00 Step 01. Check remote peer capacity. FAILED. Exiting Netflow device mover.
2019-06-24T14:15:48+00:00 Checking device: 172.24.0.195
2019-06-24T14:15:48+00:00 01. Check remote peer capacity.
2019-06-24T14:15:48+00:00 [OK]
2019-06-24T14:15:48+00:00 Available disk space on remote peer is 123456789. It is not enough! Total needed disk space is (at least) 129456789.
2019-06-24T14:15:48+00:00 02. Check remote peer disk space.
2019-06-24T14:15:48+00:00 [FAIL]
2019-06-24T14:15:48+00:00 Step 02. Check remote peer disk space. FAILED. Exiting Netflow device mover.
2019-06-24T14:15:48+00:00 Checking device: 172.24.0.187
2019-06-24T14:15:48+00:00 01. Check remote peer capacity.
2019-06-24T14:15:48+00:00 [OK]
2019-06-24T14:15:48+00:00 02. Check remote peer disk space.
2019-06-24T14:15:48+00:00 [OK]
Move NetFlow Devices
NetFlow device mover switches the flow traffic from one SevOne Dedicated NetFlow Collector to another (DNC-1 to DNC-2 or NMS to DNC or NMS to NMS or DNC to NMS) and then, backfills the missing data. This ensures minimal data loss since the downtime is only the amount of time it takes you to switch the flow traffic and not the transfer time itself. Prior to moving the device, you must execute Pre-Checks to ensure that you have enough disk space and capacity on the device you are moving to, to perform the move.
While NetFlow device move operation is in progress anywhere in the cluster, the NetFlow discovery is locked on the source and destination pair only. When discovery is locked, on the source and destination pair ,
-
No new Netflow devices are discovered.
-
No changes to existing Netflow devices are identified i.e., addition of new interfaces.
After device move operation completes, discovery runs again and discovers the new flows which were blocked during the device move. Existing flows continue to be collected from all existing devices without any impact to flow collection and reporting.
During the NetFlow device move operation, there is no capability to create any FlowFalcon Reports for the devices that are currently being moved until the device move operation has completed successfully and the NetFlow discovery process has executed on the destination peer of the NetFlow device move operation. All other NetFlow devices that are not undergoing a NetFlow device move operation continue to report normally using FlowFalcon Reports.
-
Stop NetFlow for the device you are moving on DNC-1.
You can either stop the NetFlow or create NetFlow firewall rules using Flow Interface Manager to block the incoming traffic for that device.
-
Start NetFlow for the device you are moving on DNC-2.
Make sure you have stopped flow to DNC-1 first before starting flow on DNC-2. Otherwise, you will have duplicate data on both DNCs.
-
If DNC-2 has global Deny All rules set, run migration script /usr/local/scripts/utilities/update-netflow-firewall-permit.sh on DNC-1 to enable migration of NetFlow permissions from DNC-1 to DNC-2 .
$/usr/local/scripts/utilities/update-netflow-firewall-permit.sh --remote-peer-ip|-r <Remote peer IP> --device-file|-f <File with Device IP list>-
Both, remote-peer-ip and device-file, are mandatory options.
-
Current version of update-netflow-firewall-permit.sh requires you to provide option device-file with a list of devices even if there is only one device in the list.
-
update-netflow-firewall-permit.sh must be executed on the source peer prior to moving the device.
-
-
Check run-time of ffupdater.
$grep-r ffupdater/etc/cron-available.d/ -
Before a device is moved, the device move process checks to see if the ffupdater cycle, in progress, has completed successfully as the flow is redirected. If the ffupdater cycle has not yet completed, it will internally wait for the cycle to complete. Once the cycle completes, it will automatically process the device move.
To force a device move, flag --force-move has been added. You will get a message informing you of the possible consequences for using the flag.
-
Execute SevOne-act flowdb move command on DNC-1 for your particular device or give it a list, to move multiple devices.
When you execute the SevOne-act flowdb move command, you must be in a screen session to ensure that the move operations complete successfully and do not abort due to SSH connection timeout.
Start screen session$screenIf you are only performing a check using the -p, -c, -d options with SevOne-act flowdb move command, you are not required to be in a screen session.
-
You need to specify label for the move. If something goes wrong, using the label, you can check the logs or redo the move.
-
You must specify the device IP address you want to move and the peer IP address you want to move it to.
$ SevOne-act flowdb move --label devMove1 --device 10.2.12.199 --remote-peer-ip 10.129.13.66 --verbose -
To move multiple devices, you must have a list of devices in a file (each device IP address must be on a new row). Execute the following command to make the move.
$ SevOne-act flowdb move --label devMove1 --device-filemyDeviceFile.txt --remote-peer-ip 10.129.13.66 --verbose- label must always be less than 10 characters long.
- There must be no blank lines in the device file.After executing the SevOne-act flowdb move command above, logs can be found in /var/SevOne/flowdb-move.log.
-
-
Restart SevOne-flowdbd on DNC-1. This can cause data loss for 1 minute. Each minute, Netflowd sends raw data to SevOne-flowdb. If SevOne-flowdb is in the middle of processing the raw data, data loss may occur. Data loss may also occur in Aggregated Data during the period of move process.
-
You must restart SevOne-flowdbd to update its internal state about the missing data which has been transferred to DNC-2.
-
If you are planning to decommission DNC-1, you can skip the following step.
$ supervisorctl restart SevOne-flowdbd
-
All available parameters can be seen using --help.
$ SevOne-act flowdb move --helpUsage:$ [ OPTIONS ] Move Netflow device to other peer.This script accepts the following options:Flags Description================================================================================--remote-peer-ip (Required) Remote peer IP.--device (Optional) Device IP. Default: --device-file (Optional) File with Device IP list. Default: --label (Required) Label.--add-iptable-rules (Optional) --remove-iptable-rules (Optional) -c, --only-check-capacity(Optional) -d, --only-check-disk-space(Optional) -p, --do-pre-checks (Optional) -h, --help (Optional) Print this help message, more info with --verbose-q, --quiet (Optional) Hide all of the logging output-v, --verbose (Optional) Shows all of the logging output, used for debugging--no-color (Optional) Pass this flag to disable the use of color.--serialize-as-json (Optional) Pass this flag to have the output serialized as json at the command line--lock (Optional) Use this to force a process lock--conf-file (Optional) Use this setting to read settings in from a conf file--export-conf-file (Optional) Use this setting to write the current setting to a conf file. The script will still execute