Table of Contents (Start)
- Topics
- Introducing SevOne
- Login
- Startup Wizard
- Dashboard
- Global Search - Advanced Search
- Report Manager
- Report Attachment Wizard
- Report Properties
- Report Interactions
- Instant Graphs
- TopN Reports
- Alerts
- Alert Archives
- Alert Summary
- Instant Status
- Status Map Manager
- Edit Maps
- View Maps
- FlowFalcon Reports
- NBAR Reports
- Logged Traps
- Unknown Traps
- Trap Event Editor
- Trap Destinations
- Trap Destination Associations
- Policy Browser
- Create and Edit Policies
- Webhook Definition Manager
- Threshold Browser
- Create and Edit Thresholds
- Probe Manager
- Discovery Manager
- Device Manager
- New Device
- Edit Device
- Object Manager
- High Frequency Poller
- Device Summary
- Device Mover
- Device Groups
- Object Groups
- Object Summary
- Object Rules
- VMware Browser
- AWS Plugin
- Azure Plugin (Public Preview)
- Calculation Plugin
- Database Manager
- Deferred Data Plugin
- DNS Plugin
- HTTP Plugin
- ICMP Plugin
- IP SLA Plugin
- JMX Plugin
- NAM
- NBAR Plugin
- Portshaker Plugin
- Process Plugin
- Proxy Ping Plugin
- SDWAN Plugin
- SNMP Plugin
- VMware Plugin
- Web Status Plugin
- WMI Plugin
- xStats Plugin
- Indicator Type Maps
- Device Types
- Object Types
- Object Subtype Manager
- Calculation Editor
- xStats Source Manager
- User Role Manager
- User Manager
- Session Manager
- Authentication Settings
- Preferences
- Cluster Manager
- Maintenance Windows
- Processes and Logs
- Metadata Schema
- Baseline Manager
- FlowFalcon View Editor
- Map Flow Objects
- FlowFalcon Views
- Flow Rules
- Flow Interface Manager
- MPLS Flow Mapping
- Network Segment Manager
- Flow Protocols and Services
- xStats Log Viewer
- SNMP Walk
- SNMP OID Browser
- MIB Manager
- Work Hours
- Administrative Messages
- Enable Flow Technologies
- Enable JMX
- Enable NBAR
- Enable SNMP
- Enable Web Status
- Enable WMI
- IP SLA
- SNMP
- SevOne Data Publisher
- Quality of Service
- Perl Regular Expressions
- Trap Revisions
- Integrate SevOne NMS With Other Applications
- Email Tips and Tricks
- SevOne NMS PHP Statistics
- SevOne NMS Usage Statistics
- Glossary and Concepts
- Map Flow Devices
- Trap v3 Receiver
- Guides
- Quick Start Guides
- AWS Quick Start Guide
- Azure Quick Start Guide (Public Preview)
- Data Miner Quick Start Guide
- Flow Quick Start Guide
- Group Aggregated Indicators Quick Start Guide
- IP SLA Quick Start Guide
- JMX Quick Start Guide
- Metadata Quick Start Guide
- RESTful API Quick Start Guide
- Self-monitoring Quick Start Guide
- SevOne NMS Admin Notifications Quick Start Guide
- SNMP Quick Start Guide
- Synthetic Indicator Types Quick Start Guide
- Topology Quick Start Guide
- VMware Quick Start Guide
- Web Status Quick Start Guide
- WMI Quick Start Guide
- xStats Quick Start Guide
- xStats Adapter - Accedian Vision EMS (TM) Quick Start Guide
- Deployment Guides
- Automated Build / Rebuild (Customer) Instructions
- Generate a Self-Signed Certificate or a Certificate Signing Request
- SevOne Best Practices Guide - Cluster, Peer, and HSA
- SevOne Data Platform Security Guide
- SevOne NMS Implementation Guide
- SevOne NMS Installation Guide - Virtual Appliance
- SevOne NMS Advanced Network Configuration Guide
- SevOne NMS Installation Guide
- SevOne NMS Port Number Requirements Guide
- SevOne NMS Upgrade Process Guide
- SevOne Physical Appliance Pre-Build BIOS and RAID Configuration Guide
- SevOne SAML Single Sign-On Setup Guide
- Cloud Platforms
- Other Guides
- Quick Start Guides
SevOne NMS Implementation Guide
SevOne Documentation
All documentation is available from the IBM SevOne Support customer portal.
© Copyright International Business Machines Corporation 2024.
All right, title, and interest in and to the software and documentation are and shall remain the exclusive property of IBM and its respective licensors. No part of this document may be reproduced by any means nor modified, decompiled, disassembled, published or distributed, in whole or in part, or translated to any electronic medium or other means without the written consent of IBM.
IN NO EVENT SHALL IBM, ITS SUPPLIERS, NOR ITS LICENSORS BE LIABLE FOR ANY DAMAGES, WHETHER ARISING IN TORT, CONTRACT OR ANY OTHER LEGAL THEORY EVEN IF IBM HAS BEEN ADVISED OF THE POSSIBILITY OF SUCH DAMAGES, AND IBM DISCLAIMS ALL WARRANTIES, CONDITIONS OR OTHER TERMS, EXPRESS OR IMPLIED, STATUTORY OR OTHERWISE, ON SOFTWARE AND DOCUMENTATION FURNISHED HEREUNDER INCLUDING WITHOUT LIMITATION THE WARRANTIES OF DESIGN, MERCHANTABILITY OR FITNESS FOR A PARTICULAR PURPOSE, AND NONINFRINGEMENT.
IBM, the IBM logo, and SevOne are trademarks or registered trademarks of International Business Machines Corporation, in the United States and/or other countries. Other product and service names might be trademarks of IBM or other companies. A current list of IBM trademarks is available on ibm.com/trademark.
About
The SevOne NMS software is loaded on your virtual machine or you appliance which this document will refer to as a peer from this point on. After you follow the steps in the SevOne NMS Installation Guide to assign the peer an IP address, you are ready to use this document to get started with the SevOne application. If you plan to use SevOne NMS in a manner that meets Common Criteria security standards, please see the Common Criteria Considerations chapter in this document.
This document describes what you can do to have SevOne NMS discover and poll the devices in your network.
In this guide if there is,
-
[any reference to master] OR
-
[[if a CLI command contains master] AND/OR
-
[its output contains master]],
it means leader.
And, if there is any reference to slave, it means follower.
Starting SevOne NMS 6.7.0, MySQL has moved to MariaDB 10.6.12 .
Multi-Peer Implementations
The Cluster Manager provides an Integration tab to enable you to build your cluster and to add new appliances as peers into an existing cluster. Please refer to section Build Your SevOne NMS Cluster below for details.
SevOne NMS Log On
Perform the following steps to log onto your SevOne NMS appliance. You will change the default admin user password in a later step.
-
Enter the URL for the SevOne NMS appliance into your web browser to display the Login page.
If Single Sign-On is Disabled
Continue to bullet 2. below.
If Single Sign-On is Enabled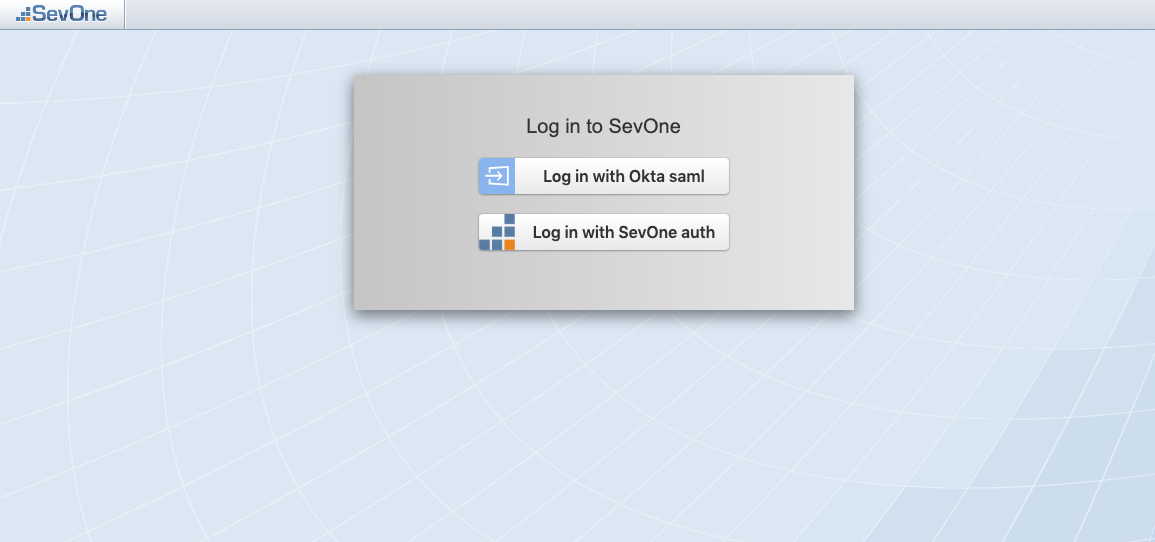
In this example, besides having the ability to login with SevOne auth, you see an Identity Provider, Okta saml, supported on the appliance.
Okta saml is only an example. Besides Log in with SevOne auth, you will see your own list of Identity Providers.
ExampleClick on Log in with SevOne auth or Log in with Okta saml.
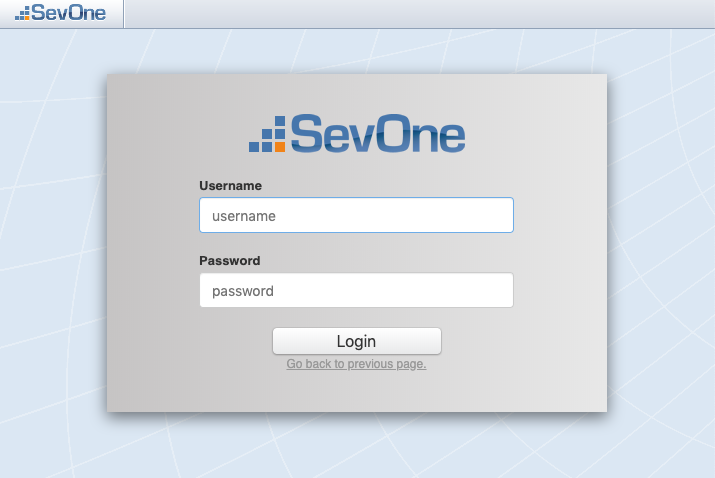
If Log in with SevOne auth is selected, you will get the following display. Continue to bullet 2. below.
If Log in with Okta saml is selected, you will get the following display.
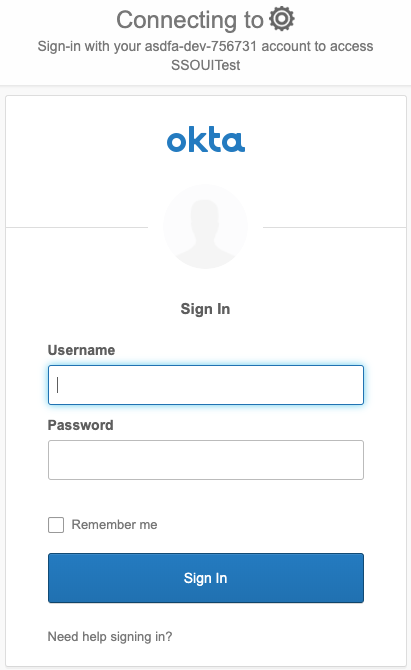
To continue, please refer to SevOne SAML Single Sign-On Setup Guide.
-
In the Username field, enter admin.
-
In the Password field, enter SevOne (case-sensitive).
-
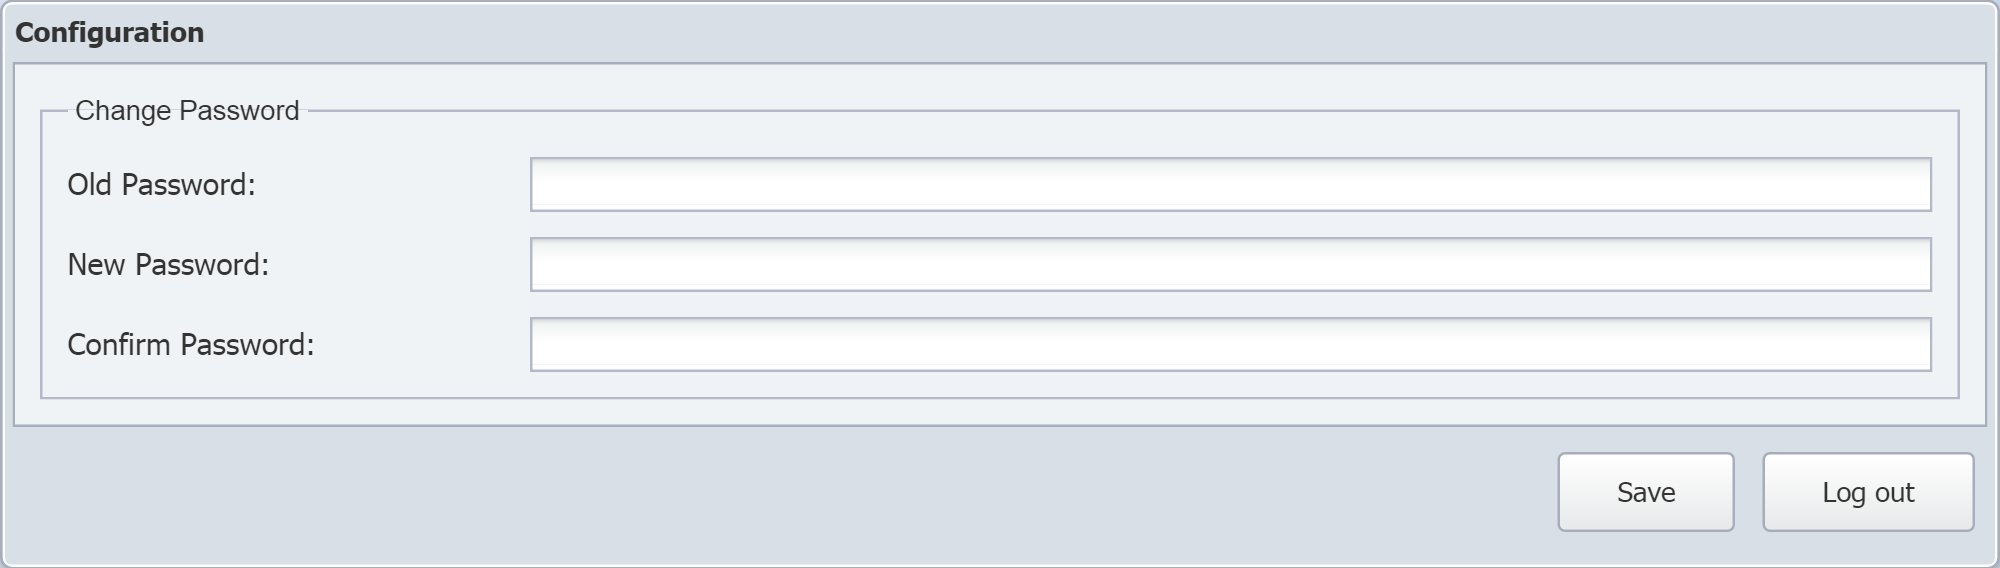
You will be prompted to create a new password. On the Configuration pop-up, perform the following actions:
-
In the Old Password field, enter the current password (the one you just entered).
-
In the New Password field, enter a new password.
-
In the Confirm Password field, re-enter the new password.
-
Click Save.
-
Configure Time Zone
The time zone settings for the appliance system times should NOT be changed using the appliance command line.
The time zone setting for system time must remain as UTC.
Perform the following steps to configure the time zone for your SevOne NMS appliance.
From the navigation bar, click Administration and select My Preferences. You can also click your <user name> next to the Logout button.
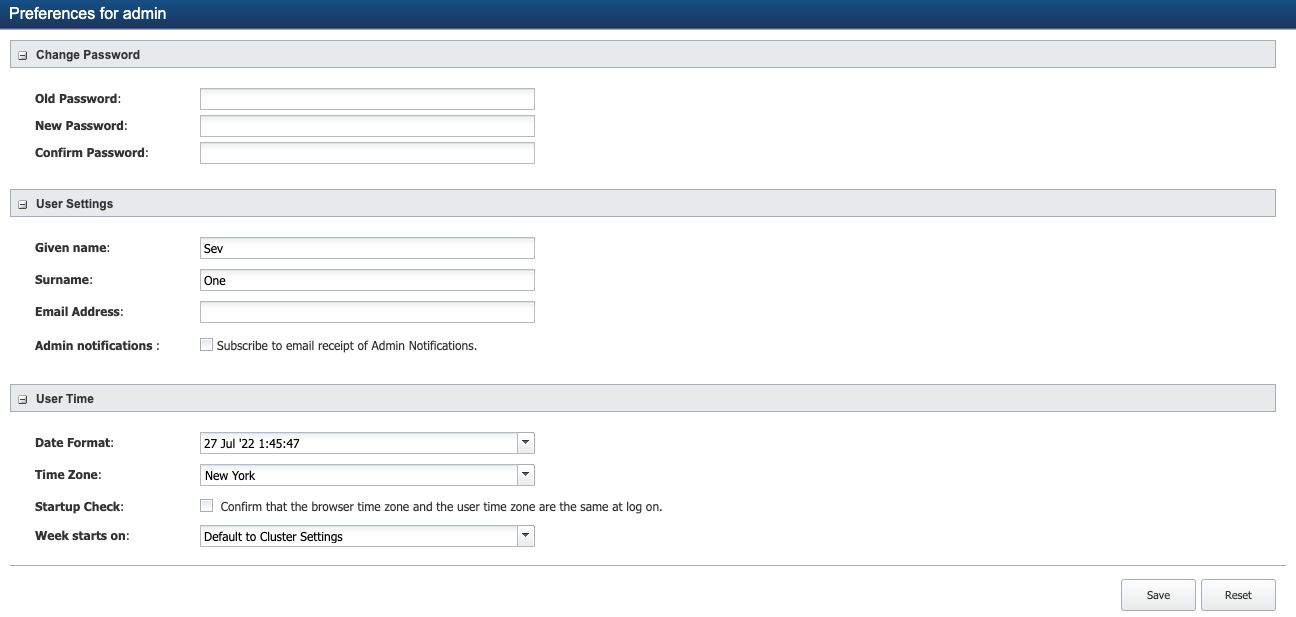
Change Password
-
In the Old Password field, enter your current password.
-
In the New Password field, enter your new password.
-
In the Confirm Password field, enter your new password a second time.
User Settings
-
In the Given name field, enter the name to display next to the word Welcome on the Welcome Dashboard.
-
In the Surname field, enter the surname to appear next to the given name on the navigation bar.
-
In the Email Address field, enter the email address to which SevOne NMS sends you alerts and reports.
-
Select the Admin notifications check box to subscribe to email receipt of Admin Notifications.
User Time
-
Click the Date Format drop-down and select the date format to use by default.
-
Click the Time Zone drop-down and select a time zone. This is the time zone that appears as the default for the graphs and reports you create. If a time zone does not appear in the list, you can add time zones on the Cluster Manager > Cluster Settings tab.
-
Select the Startup Check check box if you want SevOne NMS to verify that the time zone for the application is the same as the time zone for the browser.
-
Click the Week starts on drop-down and select the start day of the week. Options are Saturday, Sunday, Monday, or Default to Cluster Settings (where it picks the day set in Cluster Manager > Cluster Settings > General subtab).
The value set in Cluster Manager > Cluster Settings > General > Week starts on field overwrites any user specified setting when reports are mailed. For example,
Cluster Manager > Cluster Settings > General > Week starts on is set to Sunday .
Administration > My Preferences > Week starts on is set to Monday .
When reports are mailed, it will choose the day set in Cluster Manager (Sunday as shown in this example) as the week's start day.
Localization
-
Click the Language drop-down and select a language. This option appears when you select the Enable Localization check box on the Cluster Manager > Cluster Settings > General subtab. Localization is a work in progress beta feature.
-
Click Save.
Guest users (LDAP / TACACS / RADIUS) cannot modify fields in My Preferences.
Startup Wizard
When the admin user logs on to SevOne NMS for the first time, the Startup Wizard appears to guide you through the first initial steps to get devices you want to monitor and poll into SevOne NMS for discovery. If this is your first SevOne appliance proceed through the Startup Wizard.
Users with administration roles can access the Startup Wizard from the navigation bar, however the intent of the Startup Wizard is to help with your initial SevOne NMS implementation. All Startup Wizard workflows are duplicated within the application as noted in this document. If needed, click the Administration menu and select Startup Wizard.
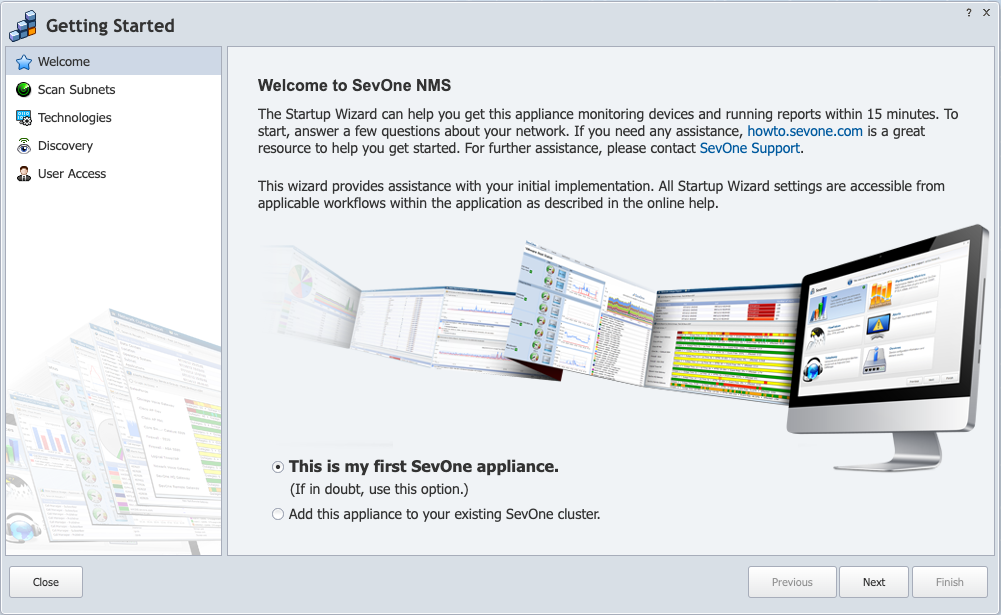
Welcome
The Welcome page on the Startup Wizard provides a link to howto.sevone.com which is a great source to help you get started.
First Appliance Option
To start a new SevOne NMS implementation, select the This is my first SevOne appliance option and click Next to display the Scan Subnets page on the Startup Wizard.
Existing Cluster Option
If you intend to add this appliance as a new peer in an existing cluster, DO NOT ADD DEVICES TO THIS APPLIANCE until after you add this appliance to your cluster. There is no way to combine the device databases of non-clustered/non-peered appliances.
-
Select the Add this appliance to your existing SevOne NMS cluster option and click Next to access the Cluster Manager > Integration tab. Please refer to section Build Your SevOne NMS Cluster below for details.
-
Use the Device Mover to move devices to the new peer after you add the appliance as a new peer in the cluster.
Scan Subnets
The Scan Subnets wizard page enables you to create IP address ranges to scan your network for items that can be pinged.
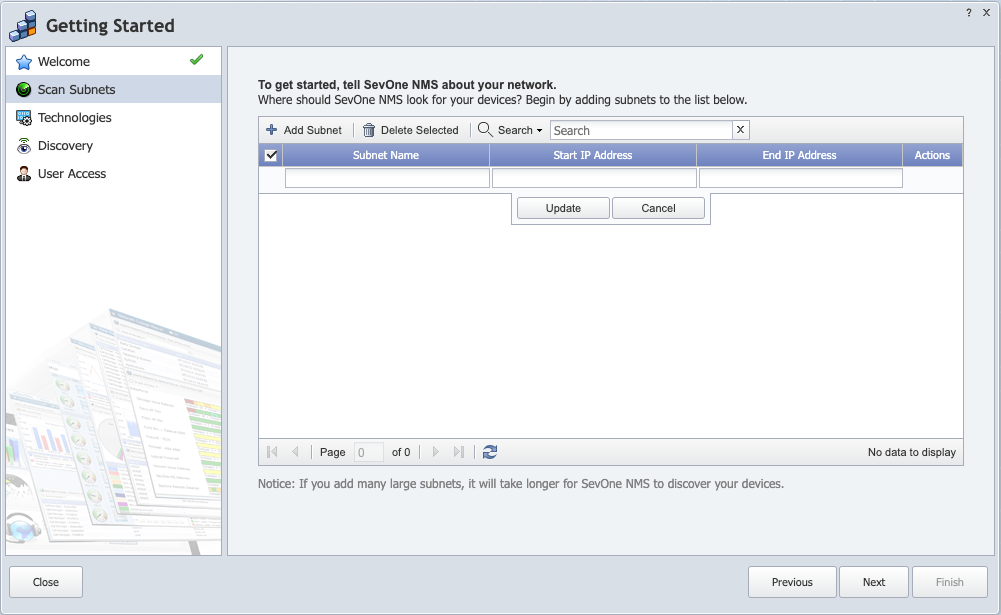
Each IP address range assigns devices to the peer on which you are logged on, creates devices, checks SNMP, and groups devices into a device group with the name you give to the IP address range. All subnets are scanned one time upon click of the Finish button. The entries you make on this wizard page are duplicated on the Discovery Manager Watched Subnets tab. The Device Manager displays the devices from which data is polled.
-
Click Add Subnet to add a row to the list.
-
In the Subnet Name field, enter the name of the subnet block.
-
In the Start IP Address field, enter the low end of the IP address range.
-
In the End IP Address field, enter the high end of the IP address range.
-
Click Update to add the subnet to the list to watch.
-
Repeat the previous steps to create additional subnets.
-
Click Next.
Technologies
When you enable devices to send data to SevOne NMS, default settings enable you to monitor the many technologies on the devices you add to SevOne NMS. SNMP and VMware require you to enter some information about your network and the Technologies wizard page enables you to get started.
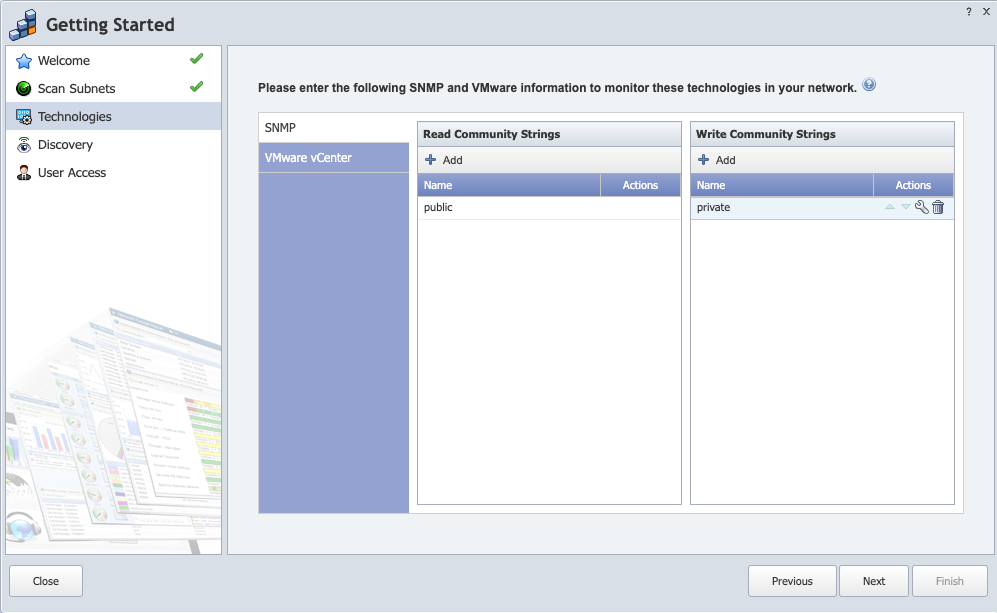
SNMP
The SNMP subtab enables you to enter the community strings SevOne NMS needs to monitor SNMP data. You can update these settings on the Cluster Manager > Cluster Settings tab.
-
In either the Read Community Strings column or the Write Community Strings column click Add to add a row to the list.
-
In the Name field, enter the community string.
-
Click Update to add the string.
-
Repeat the previous steps to add additional strings.
-
Click
 or
or  to move the string up or down through the list. SevOne NMS tries each string in the sequence in which they appear and stops at the first successful string.
VMware
The VMware vCenter subtab enables you to enter the VMware vCenter login credentials. This enables SevOne NMS to discover and monitor the virtual hosts and virtual machines on the vCenter. The VMware Browser enables you to add additional vCenters and to manage the devices from which to poll VMware data.
-
In the VMware vCenter IP Address field, enter the IP address of the VMware vCenter.
-
In the Username field, enter the user name SevOne NMS needs to authenticate onto the vCenter.
-
In the Password field, enter the password SevOne NMS needs to authenticate onto the vCenter.
-
Select the Automatically Discover Devices check box to poll the vCenter's hosts and virtual machines on a daily basis.
Click Next.
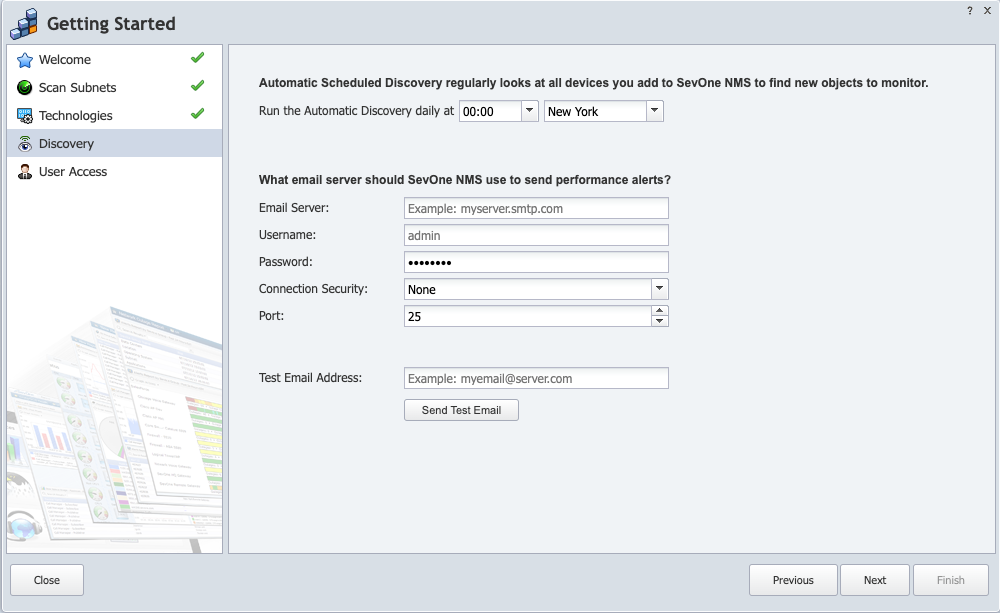
Discovery
The Discovery wizard page enables you to set the time for SevOne NMS to perform the daily Automatic Discovery process and to define the email server that SevOne NMS uses to email reports and alerts.
Discovery is the process to query and update information about the devices that are in SevOne NMS. Device discovery creates new objects in SevOne NMS, updates existing objects, and ultimately deactivates and deletes unused objects.
-
Manual Discovery - The Manual Device discovery process runs every two minutes to scan the devices in SevOne NMS that you mark for discovery
-
Automatic Discovery - The Automatic Discovery process tests the various plugins/technologies you configure for each device and updates the device's current state.
You define the Automatic Discovery time for each peer in the cluster on the Cluster Manager > Peer Settings tab.
-
Click the Run the Automatic Discovery daily at drop-down and select the time to run the Automatic Discovery process.
-
Click the second drop-down and select the time zone.
Email Server
The rest of the page enables you to enter the email server information for SevOne NMS to use to notify users of alerts and to send reports to users. You can update these settings on the Cluster Manager > Cluster Settings tab.
Note: The email server must be able to accept large attachments because a .pdf report can be over 20MB.
-
In the Email Server field, enter the hostname or IP address of the SMTP email server for SevOne NMS to use to send emails.
-
In the Username field, enter the user name SevOne NMS needs to authenticate onto the email server.
-
In the Password field, enter the password SevOne NMS needs to authenticate onto the email server.
-
Click the Connection Security drop-down and select a connection security protocol.
-
In the Port field, enter the port on the email server for SevOne NMS to use.
-
In the Test Email Address field, enter the email address to which you want to send a test email.
-
Click Send Test Email to send a test email to the address you enter in the previous step.
-
Click Next.
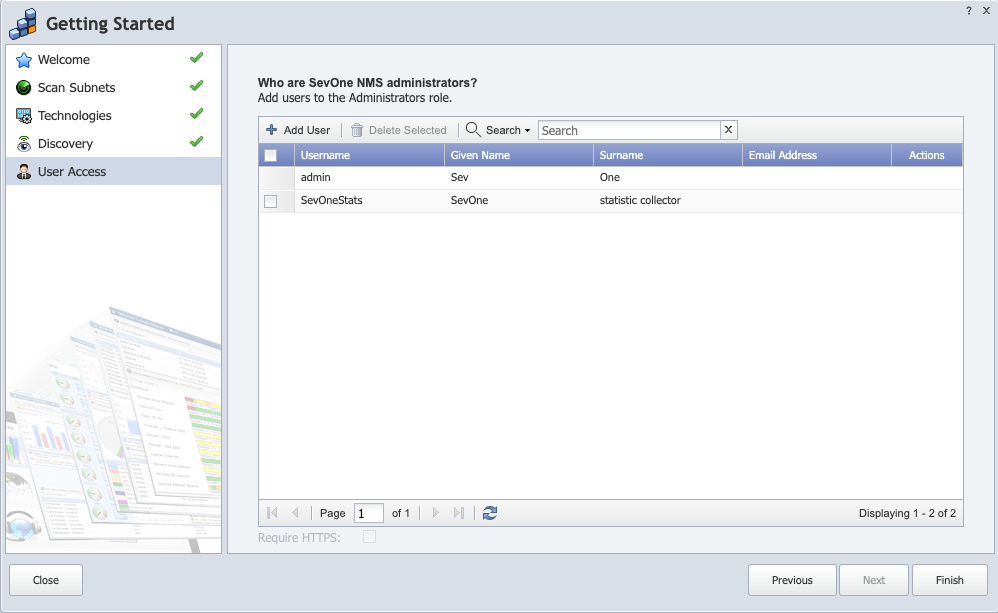
User Access
The User Access page enables you to add users who are to be members of the Administrators user role. You must define the email server before you can add Administrator role users. You add all other users with any other user role on the User Role Manager.
Each user can update their user settings, except username, on the Preferences page.
-
Click Add User to add a row to the list.
-
In the Username field, enter the name for the user to enter into the Username field on the Login page. After you save the user information, you cannot edit the Username.
-
In the Given Name field, enter the given name to display.
-
In the Surname field, enter the surname to display.
-
In the Email Address field, enter the email address where you want SevOne NMS to send emails to the user.
-
Click Update to save the user credentials. SevOne NMS sends an email to the user with the user's log on credentials.
-
Click Finish to start the scan of any subnets you define on the Scan Subnets wizard page and to display the Setup is Complete wizard page.
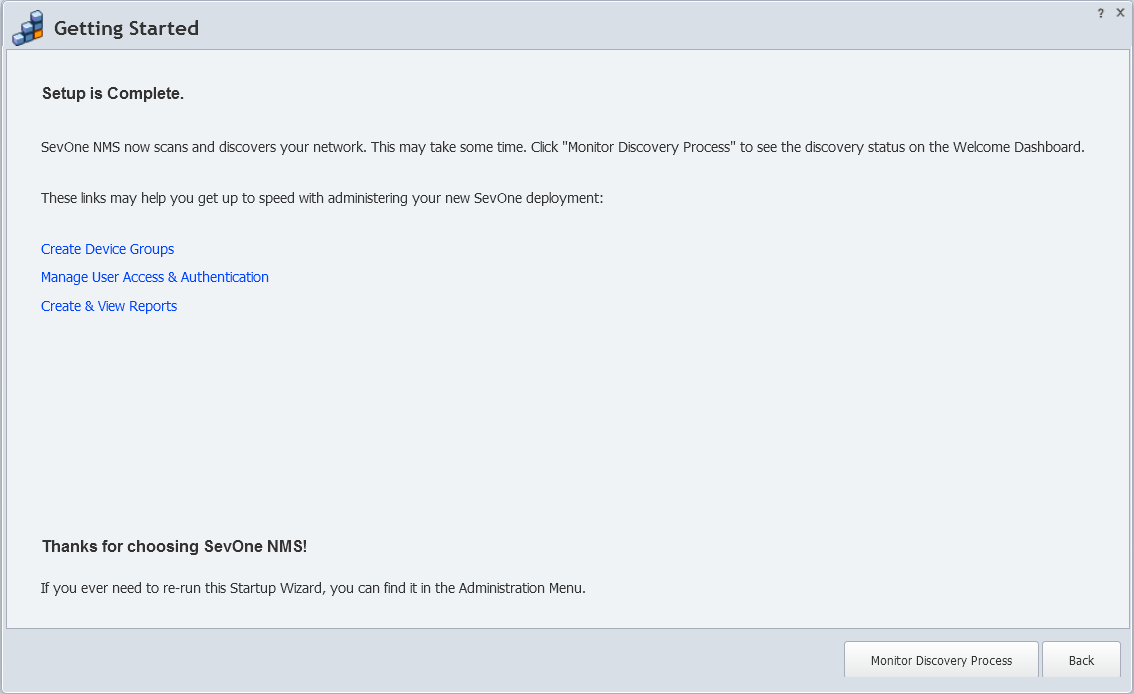
Setup is Complete
The Setup is Complete wizard page provides links to additional workflows to help you get started.
-
Click Create Device Groups to navigate to the Device Groups page where you segment the devices in your network for user access, reports, and alerts.
-
Click Manage User Access & Authentication to navigate to the User Manager page where you manage user information, credentials, and user role assignments.
-
Click Create & View Reports to navigate to the Report Manager page that provides access to the workflows that enable you to combine and customize several graphs, tables, and other individual reports into a single easy to retrieve report.
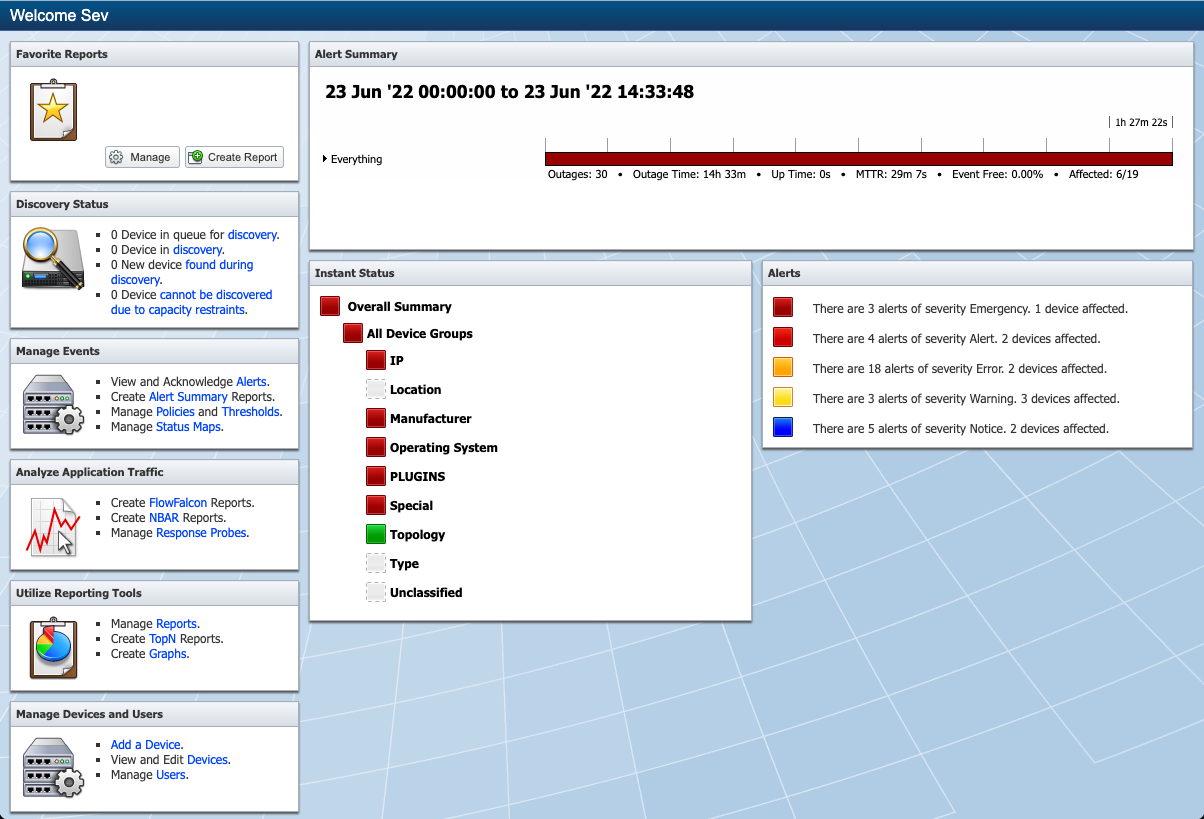
Click Monitor Discovery Process to navigate to the Welcome Dashboard.
Change SevOne NMS Admin Password
You should change the admin user password to protect access to the SevOne NMS application. While you are on the User Manager, you will also change the password for the SevOneStats user. The SevOneStats user uses deferred data scripts and the API to perform self-monitoring tasks. If you already use the self-monitoring scripts you must contact SevOne Support to update the scripts to use the new password. For a new implementation, you will be prompted to enter the SevOneStats user password when you begin to use the self-monitoring feature. Please refer to Self-monitoring Quick Start Guide for details.
Failure to change the default passwords presents a significant security risk.
Failure to change the default passwords presents a significant security risk. This publication includes the default password and this document has probably been made available to the public.
-
Click the Manage Users link to display the User Manager (or Administration > Access Configuration > User Manager).
-
Click
 next to the admin user to display the Edit User pop-up.
 -
In the Password field, enter a new password for the admin user.
-
In the Confirm field, re-enter the password.
-
Click Save.
-
Click
next to the SevOneStats user to display the Edit User pop-up. -
In the Password field, enter a new password for the SevOneStats user.
-
In the Confirm field, re-enter the password.
-
Click Save.
Build Your SevOne NMS Cluster
When you receive several new appliances/vPASs and/or your implementation includes a Hot Standby Appliance, perform the steps needed to get the new appliance/vPAS into your network before you add anything to the appliance.
Hot Standby Appliance
When you add the vPAS as a Hot Standby Appliance (HSA) you must contact SevOne Support via phone or go to IBM SevOne Support customer portal to ensure that the Hot Standby Appliance is appropriately implemented.
Hot Standby Appliance (HSA) does not have to be installed at the same location as the primary PAS.
HSA can be installed on:
-
another rack in the same data center or
-
a different data center across campus or
-
geographically distant data center
as long as the latency between the data centers is below 250ms. The lower the latency, the better!
New Appliance/vPAS to Add a Peer to an Existing Cluster
When you receive a new appliance/vPAS that you want to add to an existing cluster, perform the following steps. The SevOne NMS Cluster Manager > Integration tab enable you to add this appliance as a new peer to your SevOne cluster.
-
All data on this peer/appliance will be deleted.
-
You need to know the name of this peer (appears in the cluster hierarchy on the left side of the SevOne NMS Cluster Manager). The peer name is defined when you perform the steps in the SevOne NMS Installation Guide and you can change the peer name from the peer level on the Cluster Manager.
-
You need to know the IP address of this appliance (appears in the cluster hierarchy on the left side of the SevOne NMS Cluster Manager). You define the IP address when you perform the steps in the SevOne NMS Installation Guide.
-
You need to know the temporary integration password of the peer/appliance (appears besides the countdown timer). For example, Your appliance is currently in INCORPORATE mode. Your temporary password is 0fdf318beaed7e6e. You have 9:23 remaining until incorporate mode is turned off.
-
You need to be able to access the Cluster Manager on a peer that is already in the cluster to which you intend to add this appliance.
-
If you do not complete the steps within ten minutes, you must start again at step 2. Click Allow Peering … to queue this peer/appliance for peering within the following ten minutes.
Perform the following steps to add this appliance to an existing SevOne cluster.
-
SevOne NMS: From the Startup Wizard on the new appliance, select the Add this appliance to an existing SevOne NMS Cluster option and click Next to access the Cluster Manager > Integration tab.
-
Click Allow Peering on the new appliance.
-
SevOne NMS: Log on to a peer that already exists in the destination SevOne NMS cluster.
-
SevOne NMS: Click the Administration menu, select Cluster Manager, and then select the Peers tab.
SevOne NMS: Click Settings and select Cluster Management. -
Click Add Peer to display a pop-up.
-
Enter the Peer Name, IP Address, and temporary integration password of the new peer/appliance.
-
On the pop-up, click Add Peer.
-
All data on the peer/appliance you are adding is deleted.
-
Do not do anything on the peer you are adding until a Success message appears on the peer on which you click Add Peer.
-
You can continue working and performing business as usual on all peers that are already in the cluster.
-
The new peer appears on the Peers tab in the destination cluster with a status message. Click Refresh to update the status.
-
The new peer appears in the cluster hierarchy on the left.
-
-
After the Success message appears on the peer in the destination cluster, you can go to the peer you just added and the entire cluster hierarchy to which you added the peer should appear on the left.
-
SevOne NMS: You can use the Device Mover to move devices to the new peer.
If the integration fails, Click View Failed Logs on the SevOne NMS Peers tab on the peer that is in the destination cluster to display a log of the integration messages.
Click Clear Failed to remove failed attempts from the list. Failed attempts are not automatically removed from the list which enables you to navigate away from the Peers tab during the integration.
New Appliances in a New Multi Peer SevOne NMS Implementation
When you receive multiple PAS appliances/vPASs and you plan to create a brand new SevOne NMS cluster, there are two approaches.
Approach 1
-
Use the Cluster Manager to add all of your new appliances as peers to the cluster.
-
Add devices.
Approach 2
-
Add all devices to one peer.
-
Use the Cluster Manager to add all other appliances you want in the cluster as peers with this appliance.
-
Use the Device Mover to move devices to other peers.
Common Criteria Considerations
Common Criteria is a framework for which computer systems can make claims about the security attributes of the application. Common Criteria provides assurance that the process of specification, implementation, and evaluation of a computer security product has been conducted in a rigorous and standard and repeatable manner at a level that is commensurate with the target environment for use.
SevOne NMS (v5.5.x and higher) can be run in a Common Criteria complaint manner under the following prerequisites.
-
The peer cannot be a part of a cluster.
-
The peer cannot have a Hot Standby Appliance.
-
You must log on to the appliance via HTTPS.
-
xStats adapter configuration is not available.
-
Group aggregated indicator features are not available.
Cluster Manager, Appliance Level, Appliance Settings For Common Criteria
The Cluster Manager enables you to implement Common Criteria mode for a single peer SevOne NMS implementation. Perform the following steps to enable the appliance to meet Common Criteria security standards.
-
Log on to SevOne NMS via HTTPS.
-
Click the Administration menu and select Cluster Manager to display the Cluster Manager.
-
In the cluster hierarchy, click
 next to a peer then click <appliance IP address> to display the appliance level information on the Appliance Overview tab.
 -
Select the Appliance Settings tab.
-
Select the Enable Common Criteria check box.
-
Click Save to display a confirmation message pop-up.
-
Click OK on the pop-up to display another confirmation pop-up that informs you that a restart is required to enable Common Criteria mode.
-
Click OK on the second confirmation pop-up to start the Common Criteria enable process and to restart the appliance. If you click Cancel, the common Criteria enable process starts but remains incomplete until after the appliance is restarted.
-
Watch the status messages as the system checks and adjusts settings to meet Common Criteria standards. The page displays green check marks to display the status of the Common Criteria mode success.
If you did not click OK to restart the appliance, you must restart the appliance before the Common Criteria mode is enabled.
-
Click Save. A Date and Time subtab appears to enable you to define the appliance system date and time for Common Criteria.
-
Select the Date and Time subtab.
-
In the Date and Time field, enter the system time for the appliance.
-
Click Save to save the Date and Time settings.
Other Common Criteria Considerations
The Cluster Manager at the cluster level provides security settings that enforce password standards. On the Cluster Settings tab, the Security subtab enables you to define security settings.
-
In the Inactivity Timeout field, enter the number of minutes a user can remain inactive before SevOne NMS automatically logs the user out of the application (between 5 and 86400). The default is 30. You can override this setting for each individual user from the User Manager.
-
Select the Enable Hard Timeout check box to enable hard timeout for all users in the cluster with the exception of the admin user. Enable the check box to allow you to enter the number of minutes in Hard Timeout field the user can remain alive before SevOne NMS automatically logs them out of the application. The default value is 30 minutes. Hard Timeout field can range between 5 minute to 86400 minutes (60 days).
-
In the Minimum Password Length field, enter the number of characters users must have in their password (between 0 and 99). The default is 0. Enter 0 (zero) to disable this feature.
-
In the Enforce Password History field, enter the number of password changes a user must make before they can repeat a password (between 0 and 999). The default is 0.
-
In the Minimum Password Age field enter the number of days a user must wait between password changes (between 0 and 999). The default is 0. This feature prevents users from circumventing Password History enforcement. Enter 0 (zero) to disable this feature.
-
In the Password Change Notification field, enter the number of days to wait after a password change before a user receives a password change notification (between 0 and 999). The default is 0. Enter 0 (zero) to disable this feature.
-
In the Maximum Password Age field, enter the number of days a user account can remain enabled before the user must change their password (between 0 and 999). The default is 0. Enter 0 (zero) to disable this feature.
-
Select the Mask Read Community String check box to mask Read Community Strings on user interfaces. Write Community Strings are masked by default.
-
Select the Require Strong Passwords check box to enforce the complexity of user passwords. If you select this check box, passwords must contain at least one special character !@#$%^&*=+_?<>/~()-[{]}|\;:", and at least two of the following three types of characters: lowercase letters, UPPERCASE letters, and numbers. In addition, passwords cannot contain more than two of a given type of character in succession (upper and lowercase letters count as the same type). An example of a valid password: 8s0h43o@7!o&p3. If your current password does not meet this requirement, you will be forced to change the password at the next log on.
-
Select the Require Strong Passwords for mysql users check box to enforce the complexity of MySQL user passwords. If you select this check box, minimum length of the MySQL password must be at least 14 symbols long, contain at least one special character +-_@[]:,.%, at least one number, at least one UPPERCASE letter, and at least one lowercase letter. The valid characters are a-z, A-Z, 0-9, +-_@[]:,.%. The invalid characters are *$!#^;&. An example of a valid password: 8s0H43o@7]o%p3. Current MySQL passwords that do not meet this requirement will be changed to a random, compliant password.
By selecting the check box, the following warning message will appear. Please read the warning message and proceed with caution.
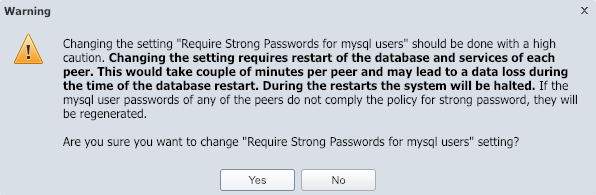
Select No to make no changes.
Select Yes will require a restart of the MySQL database and services of each peer. Click on Save button to apply the changes. This action may result in you intermittently losing access to SevOne NMS User Interface as the MySQL services are being restarted. Depending on the cluster and load per appliance, times will vary.
Log in to the SevOne NMS via the Command Line Interface (CLI) as user root to check the progress of the restart of mysqld services. Execute the command below.
Check mysqld services restart progress$ SevOne-peer-do"supervisorctl status mysqld mysqld2"Example: View status of MySQL services$ SevOne-peer-do "supervisorctl status mysqld mysqld2"
--- Gathering peer list...
--- Running command on 10.168.116.40...
Authorized uses only. All activity may be monitored and reported.
mysqld RUNNING pid 14358, uptime 0:00:12
mysqld2 STARTING
Connection to 10.168.116.40 closed.
[ OKAY ]
--- Running command on 10.168.117.67...
Authorized uses only. All activity may be monitored and reported.
mysqld RUNNING pid 5043, uptime 1:21:47
mysqld2 RUNNING pid 5085, uptime 1:21:36
Connection to 10.168.117.67 closed.
[ OKAY ]
--- Running command on 10.168.118.17...
Authorized uses only. All activity may be monitored and reported.
mysqld RUNNING pid 17089, uptime 1:20:49
mysqld2 RUNNING pid 17206, uptime 1:20:35
Connection to 10.168.118.17 closed.
[ OKAY ]
--- Running command on 10.168.117.30...
Authorized uses only. All activity may be monitored and reported.
mysqld RUNNING pid 16234, uptime 1:19:51
mysqld2 RUNNING pid 16355, uptime 1:19:36
Connection to 10.168.117.30 closed.
[ OKAY ]The processes are seen in transition between RUNNING and STARTING but you have to wait until all the peers have the mysqld and mysqld2 services in RUNNING state and the uptime is seen as close to the current time. The ones highlighted in red have still not restarted and are yet to be processed - the process is performed one peer at a time.
Example: Completion of MySQL services after restart on all appliances$ SevOne-peer-do "supervisorctl status mysqld mysqld2"
--- Gathering peer list...
--- Running command on 10.168.116.40...
Authorized uses only. All activity may be monitored and reported.
mysqld RUNNING pid 14731, uptime 0:04:35
mysqld2 RUNNING pid 14873, uptime 0:04:13
Connection to 10.168.116.40 closed.
[ OKAY ]
--- Running command on 10.168.117.67...
Authorized uses only. All activity may be monitored and reported.
mysqld RUNNING pid 22565, uptime 0:02:58
mysqld2 RUNNING pid 22800, uptime 0:02:43
Connection to 10.168.117.67 closed.
[ OKAY ]
--- Running command on 10.168.118.17...
Authorized uses only. All activity may be monitored and reported.
mysqld RUNNING pid 9207, uptime 0:01:54
mysqld2 RUNNING pid 9267, uptime 0:01:33
Connection to 10.168.118.17 closed.
[ OKAY ]
--- Running command on 10.168.117.30...
Authorized uses only. All activity may be monitored and reported.
mysqld RUNNING pid 7949, uptime 0:00:38
mysqld2 RUNNING pid 7996, uptime 0:00:23
Connection to 10.168.117.30 closed.
[ OKAY ]This indicates that the setting for Require Strong Passwords for mysql users is now enabled.
If the password was not already set for the MySQL user, or if the existing password did not meet the secure complexity requirements, then SevOne NMS will automatically set a password that meets these requirements, but the actual password may not be known to the user. In such cases, you can optionally change the password and meet the complexity requirements. Please refer to SevOne Data Platform Security Guide, section Change MySQL User Credentials for details on how to change the MySQL user credentials.
-
Select the Allow Forcelogin check box to enable SevOne NMS integration with other software applications via the Forcelogin script.
-
Select the Force Same Origin Policy check box to prevent SevOne NMS from being loaded outside of the current domain. This includes portals and the use of the force login script to load SevOne NMS into an iframe from where a malicious user could log a user's activity. Note: If you clear this check box, the application security is lowered in a way that can prevent SevOne NMS from passing specific security scans.
-
Select the Rest API Validate Certificates check box to enforce REST API to validate the certificates of the other appliances when calling their REST API services.
-
Select the Require HTTPS check box to require a secure connection for all dynamic content. You must log on via HTTPS to enable this check box.
-
Select the Allow insecure code in Simple attachment check box for SevOne NMS administrators to allow/disallow usage of custom code in the Simple attachments.
-
Enable render graph security option, when unchecked, allows the administrator to share the exact URL (for example, http://<SevOne NMS IP address>/doms/graphs/renderGraph.php?is[]=1%3A7983%3A471642%3A834×pan=Today) of the report with a user who has more restrictive (reduced) permissions. The user can enter the exact URL in the browser to view the entire contents of the report. However, for security reasons, it is highly recommended that this option is always checked to prevent users with more restrictive (reduced) permissions from crafting the URL to view a report.
-
In the Account Lockout section:
-
In the Disable Inactive Users field, enter the number of days a user can go without logging on before their account is disabled (between 0 and 999). The default is 0. Enter 0 (zero) to disable this feature, so that inactive users will never be disabled.
Note: This setting does not affect the Guest users you define on the Authentication Settings page for LDAP, TACACS, and RADIUS; nor does it affect the “admin” user.
-
In the Threshold field, enter the number of incorrect log on attempts a user can make (within the Counter Reset time span) before the account is locked. Enter 0 (zero) to disable this feature. Note: When you set this to anything other than 0 (zero), log on becomes dependent upon validation from the cluster leader peer. If the cluster leader peer is not accessible from a peer on which a user attempts to log on, access to the application will not be available. The minimum value is 0 attempts and the maximum value is 99999 attempts.
-
If you enter a number in the Threshold field, in the Counter Reset field, enter the number of minutes during which the user enters an incorrect user name and password combination before the account is locked. Set this to 0 (zero) to disable this feature. Example: Enter 3 as the Threshold and 2 as the Counter Reset. If the user incorrectly enters their user name and password combination three times in a two minute time span, the account is locked for the number of minutes you enter in the Duration field. The minimum value is 0 minutes and the maximum value is 99999 minutes.
-
If you enter a number in the Threshold field, in the Duration field, enter the number of minutes for the account to be locked after the Threshold/Counter Reset combination is exceeded (between 0 - minimum value and 99999 - maximum value). The default is 0.
-
-
Click Save to save the Security settings.