Table of Contents (Start)
- Topics
- Introducing SevOne
- Login
- Startup Wizard
- Dashboard
- Global Search - Advanced Search
- Report Manager
- Report Attachment Wizard
- Report Properties
- Report Interactions
- Instant Graphs
- TopN Reports
- Alerts
- Alert Archives
- Alert Summary
- Instant Status
- Status Map Manager
- Edit Maps
- View Maps
- FlowFalcon Reports
- NBAR Reports
- Logged Traps
- Unknown Traps
- Trap Event Editor
- Trap Destinations
- Trap Destination Associations
- Policy Browser
- Create and Edit Policies
- Webhook Definition Manager
- Threshold Browser
- Create and Edit Thresholds
- Probe Manager
- Discovery Manager
- Device Manager
- New Device
- Edit Device
- Object Manager
- High Frequency Poller
- Device Summary
- Device Mover
- Device Groups
- Object Groups
- Object Summary
- Object Rules
- VMware Browser
- AWS Plugin
- Azure Plugin (Public Preview)
- Calculation Plugin
- Database Manager
- Deferred Data Plugin
- DNS Plugin
- HTTP Plugin
- ICMP Plugin
- IP SLA Plugin
- JMX Plugin
- NAM
- NBAR Plugin
- Portshaker Plugin
- Process Plugin
- Proxy Ping Plugin
- SDWAN Plugin
- SNMP Plugin
- VMware Plugin
- Web Status Plugin
- WMI Plugin
- xStats Plugin
- Indicator Type Maps
- Device Types
- Object Types
- Object Subtype Manager
- Calculation Editor
- xStats Source Manager
- User Role Manager
- User Manager
- Session Manager
- Authentication Settings
- Preferences
- Cluster Manager
- Maintenance Windows
- Processes and Logs
- Metadata Schema
- Baseline Manager
- FlowFalcon View Editor
- Map Flow Objects
- FlowFalcon Views
- Flow Rules
- Flow Interface Manager
- MPLS Flow Mapping
- Network Segment Manager
- Flow Protocols and Services
- xStats Log Viewer
- SNMP Walk
- SNMP OID Browser
- MIB Manager
- Work Hours
- Administrative Messages
- Enable Flow Technologies
- Enable JMX
- Enable NBAR
- Enable SNMP
- Enable Web Status
- Enable WMI
- IP SLA
- SNMP
- SevOne Data Publisher
- Quality of Service
- Perl Regular Expressions
- Trap Revisions
- Integrate SevOne NMS With Other Applications
- Email Tips and Tricks
- SevOne NMS PHP Statistics
- SevOne NMS Usage Statistics
- Glossary and Concepts
- Map Flow Devices
- Trap v3 Receiver
- Guides
- Quick Start Guides
- AWS Quick Start Guide
- Azure Quick Start Guide (Public Preview)
- Data Miner Quick Start Guide
- Flow Quick Start Guide
- Group Aggregated Indicators Quick Start Guide
- IP SLA Quick Start Guide
- JMX Quick Start Guide
- Metadata Quick Start Guide
- RESTful API Quick Start Guide
- Self-monitoring Quick Start Guide
- SevOne NMS Admin Notifications Quick Start Guide
- SNMP Quick Start Guide
- Synthetic Indicator Types Quick Start Guide
- Topology Quick Start Guide
- VMware Quick Start Guide
- Web Status Quick Start Guide
- WMI Quick Start Guide
- xStats Quick Start Guide
- xStats Adapter - Accedian Vision EMS (TM) Quick Start Guide
- Deployment Guides
- Automated Build / Rebuild (Customer) Instructions
- Generate a Self-Signed Certificate or a Certificate Signing Request
- SevOne Best Practices Guide - Cluster, Peer, and HSA
- SevOne Data Platform Security Guide
- SevOne NMS Implementation Guide
- SevOne NMS Installation Guide - Virtual Appliance
- SevOne NMS Advanced Network Configuration Guide
- SevOne NMS Installation Guide
- SevOne NMS Port Number Requirements Guide
- SevOne NMS Upgrade Process Guide
- SevOne Physical Appliance Pre-Build BIOS and RAID Configuration Guide
- SevOne SAML Single Sign-On Setup Guide
- Cloud Platforms
- Other Guides
- Quick Start Guides
SNMP Walk
The SNMP Walk page enables you to discover and certify SNMP MIBs and to troubleshoot SNMP connectivity problems. For details, please refer to the SNMP topic.
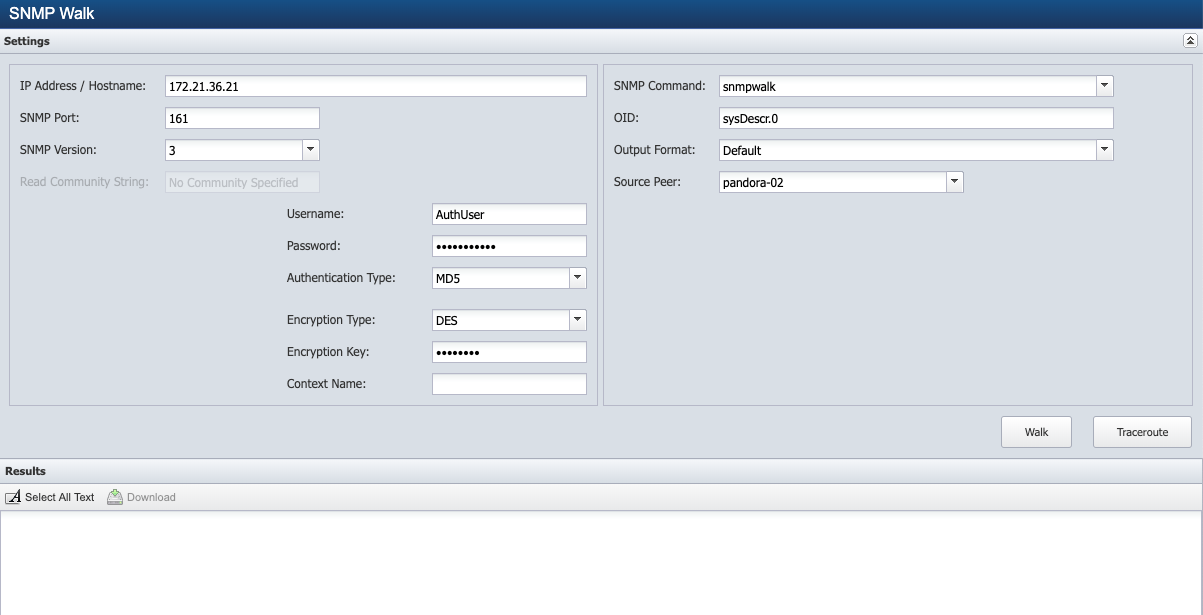
To access the SNMP Walk page from the navigation bar, click the Devices menu and select SNMP Walk. The Device Manager also provides access to the SNMP Walk.

Perform an SNMP Walk / Traceroute
When you access the SNMP Walk page from the Device Manager, some of the following fields are pre-populated.
-
In the IP Address/Hostname field, enter the IP address or Hostname of the device.
-
In the SNMP Port field, enter the port on which the device is listening for SNMP traffic.
-
Click the SNMP Version drop-down and select the SNMP version of the device.
-
If you select SNMP Version 1 or 2c, in the Read Community String field, enter the read only community string SevOne NMS needs to authenticate onto the device if the string is different from what you enter on the Cluster Manager. Leave clear to use the string from the Cluster Manager > Cluster Settings tab.
-
If you select Version 3, complete the following fields.
-
In the Username field, enter the user name SevOne NMS needs to authenticate onto the device.
-
In the Password field, enter the password SevOne NMS needs to authenticate onto the device.
-
Click the Authentication Type drop-down.
-
Select None (usmNoAuthProtocol) to not use an authentication method to send or receive messages.
-
Select MD5 (usmHMACMD5AuthProtocol) to use MD5 authentication protocol for messages.
-
Select SHA (usmHMACSHAAuthProtocol) to use SHA authentication protocol for messages.
-
-
If you select MD5 or SHA in the previous step, click the Encryption Type drop-down.
-
Select None to not use encryption to send or receive messages.
-
Select AES to use the Advanced Encryption Standard encryption method.
-
Select DES to use the Data Encryption Standard encryption method.
-
-
If you select AES or DES in the previous step, in the Encryption Key field, enter the localized key the authentication protocol on the device requires to authenticate messages.
-
In the Context Name field, enter the context name. Several vendors implement SNMP with Context to access certain objects, typically to access virtual objects. Vendor may choose checkpoint firewalls to access SNMP stats from the virtual firewalls.
-
-
-
Click the SNMP Command drop-down.
-
Select snmpwalk to query a device for an OID and all of its conceptual children.
-
Select snmpget to query the device for an OID.
-
-
In the OID field, enter the OID to walk. If you leave this to the default OID, the walk may take a while. Be specific with your search. You should use ".1.3" or ".1.3.6" to avoid partial or broken walks.
-
Click the Output Format drop-down.
-
Select Default to display OIDs in text format (e.g. IF-MIB::ifInErrors.1).
-
Select Default With Numeric Indexes to translate strings to ASCII numeric values.
-
Select Numeric OIDs to translate OIDs into numeric format (e.g. .1.3.6.1.2.1.2.2.1.14.2).
-
Select Certification Walk to translate OIDs into a form that SevOne Support Engineers can use to perform device certifications.
-
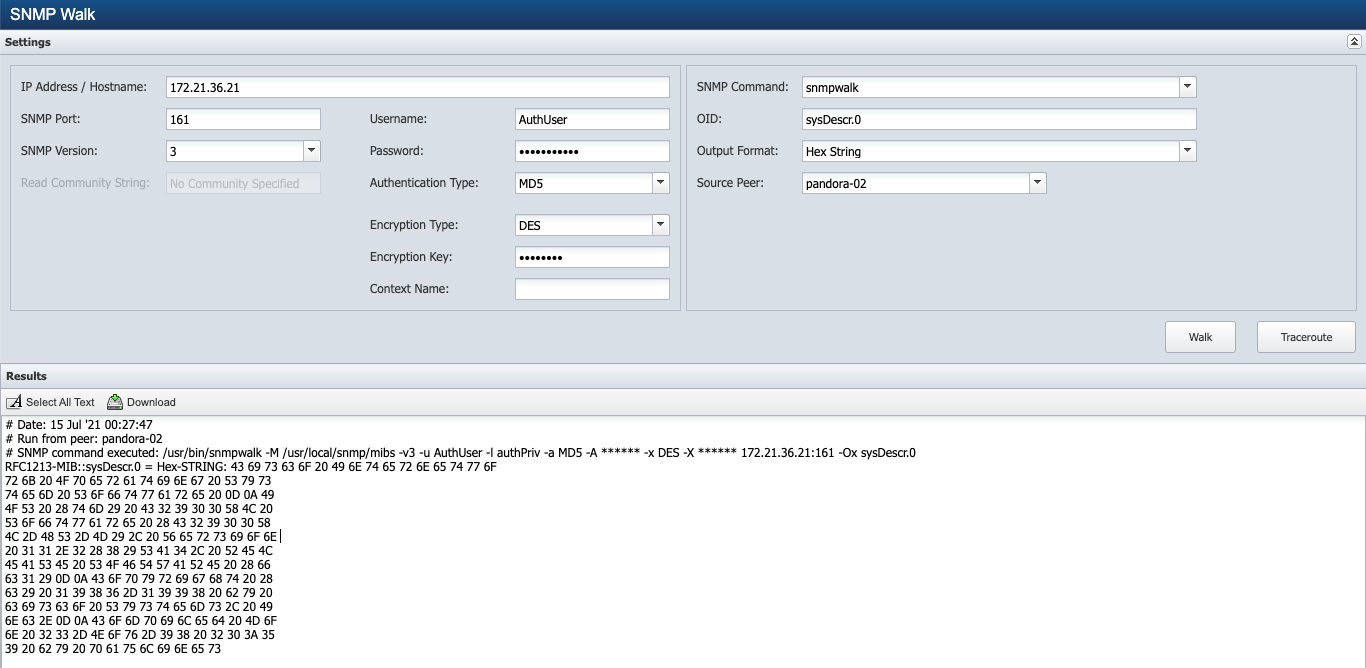
Select Hex String to display OIDs in text format and the output in HEX format.
Example
-
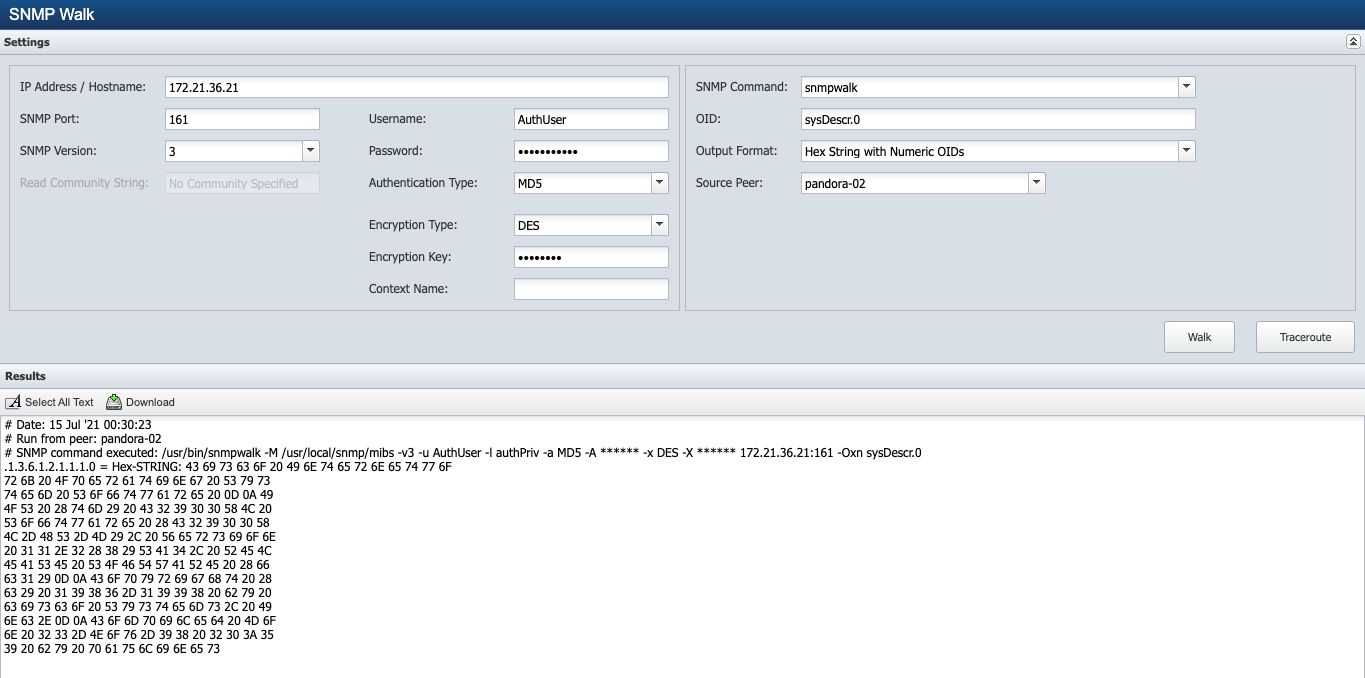
Select Hex String with Numeric OIDs to translate OIDs into numeric format and the output in HEX format.
Example
-
-
Click the Source Peer drop-down and select the peer to perform the walk.
-
Click Walk to perform the SNMP walk or Traceroute to allow troubleshooting directly from within the appliance.
SNMP Walk / Traceroute on multiple devices in one instance is not allowed.
-
After walk or traceroute is performed, Download button under Results is available.
-
Click Select All Text to enable you to copy the results to your computer clipboard so you can paste the results into an email or document etc.
-
Click Download to convert the walk / traceroute results to a .txt file you can save to your local machine.